Truman Virtual Desktop Client for Mac - Installation and Configuration Instructions
1. Download the VMWare client by clicking here
2. Open the DMG file and then drag the VMWare View App into your Application folder.
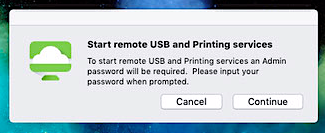
3. While installing you will be prompted to start USB and Printing Service, select Continue"
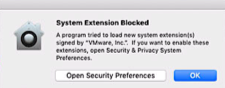
4. You may also be prompted that a system extension is blocked. Select Open Security Preferences
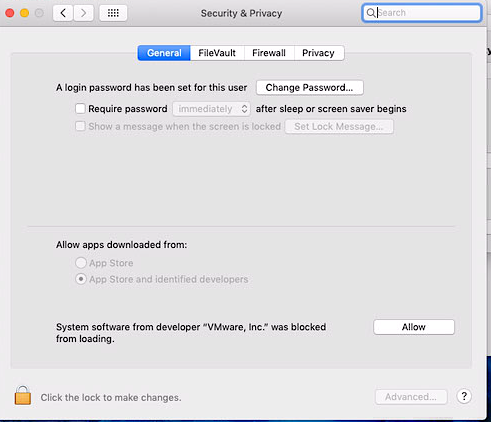
5. Select Allow
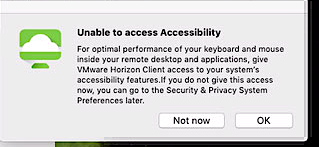
6. You may also get this prompt depending on your operating system, if so you will need click to OK
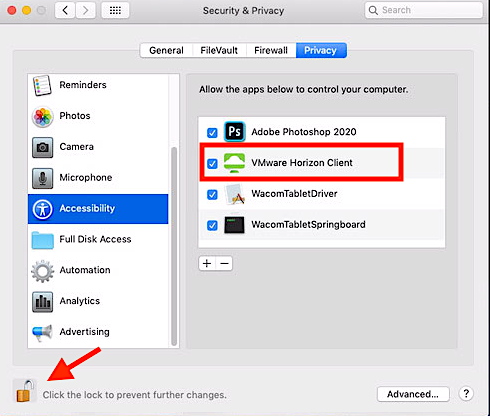
7. Then go to System Preferences, Security & Privacy 
8. Unlock the panel then select Accessibility and make sure there is a checkmark next to VMWare
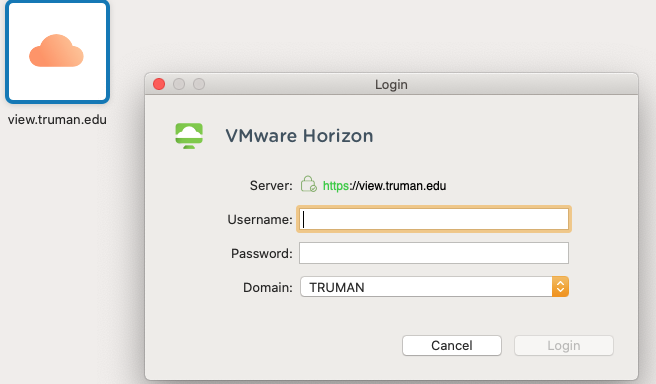
9. Open VMWare View App then click "New Server."
10. Specify "view.truman.edu" as the Connection Server Name, then Connect.

11. Enter your Truman credentials, then Login
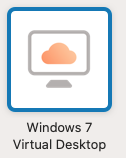
12. Select Windows 7 Virtual Desktop
Notes:
- If the VMWare client is closed, you may reconnect by following steps 9 through 12.